
This week, I wanted to share a modern baby blanket using a stitch I know you guys love: chevrons! I've done crochet chevron blankets before but this time it's a baby blanket knitting pattern that's easy to follow and looks great in a nursery. I made this for my cousin and her son Rameez (hence the name) in the colors they liked, but you can use so many color combinations with this blanket. So let get it right into it!

This blanket is knit using a simple repeat that makes up the chevron pattern. I made this as a baby blanket, but you could easily make this blanket much bigger by starting with more stitches and working more repeats than I did. I used 2 strands of my favorite acrylic yarn held together as I worked on this blanket to make it extra soft and squishy, but you can also just use one strand or substitute with your favorite thicker yarn.
Related: My Favorite Yarns for Every Kind of Project

Once I finished the baby blanket knitting pattern, I added a fleece lining and a satin ribbon to finish it off. The extra weight helps the blanket stay on as the baby sleeps and it makes it more comforting too. I love heavier blankets on myself, and my cousin was thrilled with the fleece on this blanket. Even Rameez (who's 4 now) loves how weighted it is! If he uses another blanket, he adds something on top to make it feel like this one.


Materials:
- US #10 (6.00mm) knitting needles on 32" cable
- #4 medium weight yarn
- I used 4 skeins each of Yarn Bee Soft Secret in White, Keylime, and Mist
- stitch markers - I like these locking ones and these split ring ones
- large eye needle - I like these blunt ones for seaming
Optional for lining the blanket
- Satin blanket binding - I used this
- Fleece to line the blanket
- Sewing machine
- Matching thread and fabrics scissors
The pink links are affiliate links to things I love! I receive a small commission at no extra cost to you when you use my links. Thank you!
Stitches & Abbreviations:
- k - knit
- p - purl
- YO - yarn over
- K2tog - knit 2 together
- ssk - slip, slip, knit both slipped stitches together
- p2sso - pass 2 slipped stitches over the last worked stitch
Pattern Notes:
- Skill level: Intermediate
- Sizing: 40 x 40 inches
- Gauge: 18S x 24R per inch
Rameez Baby Blanket Knitting Pattern

Row 1: Using your first color, cast on 159 stitches (or a multiple of 12, plus 3).
For a thick, squishy blanket, I held two strands of yarn together throughout the blanket. That was a personal preference, but it gives a nicer finish.
Row 2: k1, ssk, *k4, yo, k1, yo, k4, slip 2 as if to knit, k1, p2sso*. Repeat everything between the *s until the last 3 stitches (you will not complete the last repeat), then k2tog, k1.
Row 3: Purl all.
Rows 4-168: Repeat rows 2 and 3 to get the chevron pattern. You'll only really see the chevron pattern once you change colors, but you will be able to see the edges zigzag a little bit. I changed color every 24 rows and worked 7 color changes total for my chevron pattern. I started with white, then gray, green, white, gray, green, and I finished with white.
Finally, bind off loosely and weave in all ends. You've finished the baby blanket knitting pattern! Next, let's add the fleece lining.
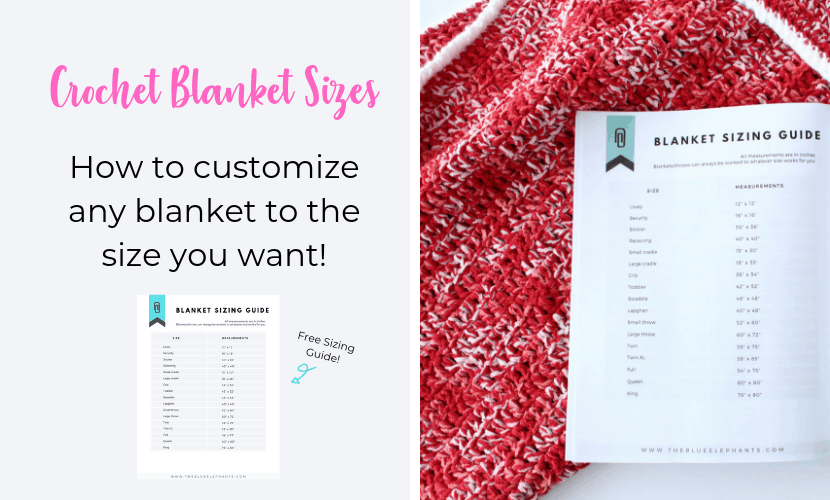
Related: How to Customize Blanket Sizes
For the Lining:
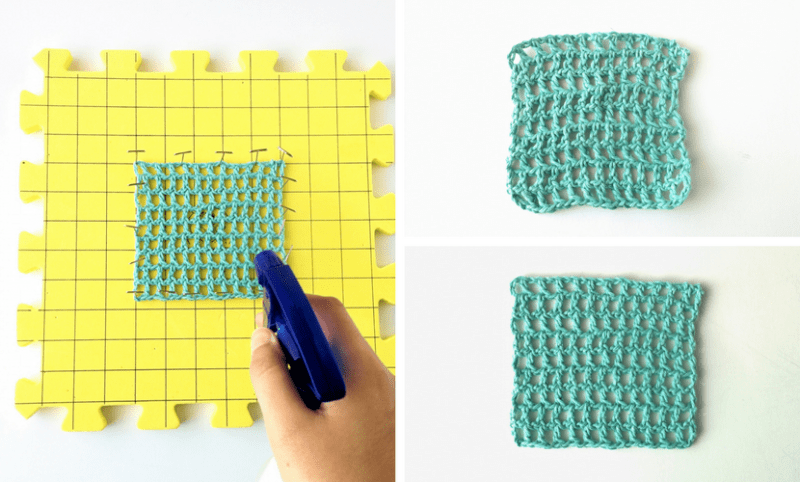
1. First, block your finished blanket. I wanted the edges of my blanket to be a bit straighter, rather than the zigzag edge from the chevron, so I blocked my blanket with the dips of the zigzag pulled out a little bit. When the blanket dried, the zigzag was still there at the edges but much less pronounced, so I continued as if the edge was straight.
Related: All About Blocking Crochet & Knits
2. Once the blanket is dry, lay it on top of the fleece to measure out how much you need. Cut the fleece so it's about a ½ inch bigger than the blanket on all sides.

3. Lay the fleece right side UP, then lay the blanket binding along the edge of the fleece, making sure the fold of the binding faces in, towards the center of the fleece. Next, ay your blanket down on top of everything else, right side DOWN. Now go around and pin all three layers together so that it stays in place when you sew it all together.

Keep the right sides together! They'll be turned out later.
Note: For the corners, you'll have to fold the binding down into a triangle. I had to do this by trial-and-error, but this is how it looked for me when I did it. Just make sure that when you sew the corners down, you are only getting the edges and not the inside of the binding.


4. Start sewing at one corner and slowly feed your blanket through the sewing machine, checking every now and then to make sure you got all three layers. Work your way around the blanket, but be sure to leave a 5-6 inch gap on the final side. You'll need the opening to turn the blanket right side out.
5. Reach into the gap you left open, pull up the opposite corner of the blanket and use it to pull out the rest of the blanket so the right sides of the knitted fabric and the fleece are on the outside. Then, go back to the sewing machine and close off the gap. Shake the blanket out a bit so it loosens up and anything stuck to it (stray pieces of thread or fleece, etc) fall off.

And you're done! That is the finished baby blanket, and now you can add little decorations or personalize it if you want. I used iron-on letters from the craft store to spell out my nephew's name.
I hope you guys enjoyed this pattern! If you did and you want to get more free patterns and tutorials delivered right to your inbox, subscribe to the newsletter below. Just enter your name and email and I'll send you yarny goodies every week! You can also check out some of my other knitting patterns here or more baby blankets here. Thanks so much for reading!
See you soon 🙂


I have the same issue as Jenny and Lisa. The way this is written, you will be 2 stitches short at the end of the row as their are only 2 yarn overs and 2 stitches decreased in the 12 stitch repeats but no yarn overs indicated for the ssk and k2tog at the beginning and end of the row to maintain the correct stitch count. This can’t be right.
@Cathy K,
Reply to self: after frogging the project twice and watching videos on chevron knitting, I found the error in the pattern posted here on Pinterest (I haven’t seen the pattern that is posted for a cost) as it just didn’t make sense the way it is written here as you would be 2 stitches short every second row. I cast on 3 stitches less then what was indicated. When I got to the last section repeat towards the end of the row, I omitted the slip 2, k1, p2sso and went straight to k2tog, k1 to end the row. It worked fine when I figured out why there were more decreases then increases the way it was written. It also wouldn’t match with the beginning of row 2 as you would have double decreases only at the end of the row.
I totally agree that there is no way this pattern will ever work out. You are decreasing at each end and never replacing these stitches! This will never work unless you add a stitch somehow at each end replacing the one stitch decreased with the ssk and the one stitch decreased working the k2tog. Impossible the way this is written.
There is just no way this pattern can work out based on what is written here, 2 stitches are being reduced at each border every other row and not replaced, the yo's in the pattern repeat are only replacing the stitches reduced in the repeat. Is there an errata for this pattern?
I love this pattern and am trying to use it for my daughter who is due this July! I seem to be having some trouble with the even rows. Based on how I’m reading the pattern, it looks like I’m decreasing by 4 every even row, but only increasing by two. Do I ssk and k2tog every even row? Thanks!
Hi Brian! Firstly, congrats on the baby! She's so lucky to have you making something special for her!
As for the pattern, you should have the same number of stitches throughout. Although you ssk at the beginning of the row and k2tog at the end, that's two stitches decreased; and the p2sso makes another 2 in every repeat. However, those are made up by purling the YOs in the next row. So the stitches you're missing are probably the YO loops being dropped on the odd rows.
Be sure to count at the end of each row for a few rows to make sure you have the right number. Once you get the hang of it, you can continue without counting as much!
Shehla I get the same result as Brian ,although the yo replaces the 2 pass over stitches for each 12 repeat the decreased 1st and last stitch from beginning & end are not replaced.....or what I’m I missing ?
I see where the confusion lies but I've tested this pattern again and the pattern worked out. Maybe you can send me a picture so I can get a look at what's happening? You can email me at hello@theblueelephants.com
This looks so cozy!! Thanks for sharing on FTAF!
Thank you! It is super comfy. All those soft baby yarns make it especially soft and gentle. The mom has actually said her little boy won't go to sleep without it <3
Aw, thank you for the kind words, Mary! I'm so glad to hear that you like it 🙂
Thank you, Chellie! The mom did request to have the baby's name somewhere on it and it was really easy to do!
Shehla what a wonderful gift for a baby's room. I think the color combination is just perfect. And the pillow which was so unexpected is also adorable. You have given Sweet Inspiration to all of us with your crocheting.
Again... beautiful! I love the monogram. Thank you for sharing at FTAF!
Thank you for sharing!
I love this color combination! How pretty! Pinning and Tweeting. Thanks for partying with us at Snickerdoodle Sunday.
Thank you!
So pretty in it's simplicity. Thanks for sharing at our party! Pinning!
Thanks!
Oh gosh...this turned out so cute! 🙂
Thanks for joining Cooking and Crafting with J & J!
aw, thanks! It's pretty easy to learn. I learned from looking up tutorials online, I'm sure you could too!
This is really beautiful. I have no idea how to knit, but projects like this make me want to learn.